With the Arac Bone Rig 1.0 script you can automate the bone-based rigging of a four tire wheel vehicle in 3ds max and animate on a spline. With the flexibility and usefulness of the bone system we can send the tool we rigged and animated to a game engine like unity yadda unreal engine 4 and we can easily use it in the project we want.
With the Arac Bone Rig 1.0 script you can automate the bone-based rigging of a four tire wheel vehicle in 3ds max and animate on a spline. With the flexibility and usefulness of the bone system we can send the tool we rigged and animated to a game engine like unity yadda unreal engine 4 and we can easily use it in the project we want.
Rotem Shiffman has announced the release of VFB+ 2.8 (Virtual Frame Buffer), the advanced frame buffer plugin for 3DS Max. It features an intuitive user interface, renders history capabilities. It support in 3DS Max 2017 for high DPI monitors and for very large images (over 2GB), changes to contrast which now uses an improved S-curve algorithm, and improved UI icons.
Features included: • 32-bit per channel color correction. • Various correction controls including exposure, gamma, multi-channel curves, vignette, chromatic aberration, bloom, glare, blur/sharpen, speckle reduction, noise reduction, etc. • Depth of Field based on Z-Depth. • VFB+ is active while rendering, including tweaking of color correction and stamping. • Captures Render Elements, G-Buffer channels, and RTT elements as well as the main pass. • Composition guides help you tweak your image. • Pixel Aspect Ratio correction display. • 4 different A|B comparison modes. • Display modes for all channels. • Support for 3D color LUTs. • Realtime RGB Histogram. • Rich WYSIWYG stamping system with virtually any imaginable variable including arbitrary MAXScript expressions. • Fully documented. • Customizable interoperability options. • MAXScript interface provides access to almost all features.
Klaudio Ladavac has created a new script for those who frequently use Maya's Distance Tool for measuring your objects. This is a small utility, a helper, which makes Maya measuring tool "Distance Tool" a bit more quick and fun to use but also more useful and interactive on top of it. The distance tool will follow the vertices as you move the components or the objects around in the scene.
Klaudio Ladavac has created a new script for those who frequently use Maya's Distance Tool for measuring your objects. This is a small utility, a helper, which makes Maya measuring tool "Distance Tool" a bit more quick and fun to use but also more useful and interactive on top of it. The distance tool will follow the vertices as you move the components or the objects around in the scene.
Munich Filmworks has just released a tool for Managing FumeFX Simulations in 3Ds Max, which can help you in testing the sim with different voxel counts and different versions quickly.
Features : • Initial Simulation Setup - Hit a button and select afterwards an object in your scene (like in Houdini). FumeFX ModernUI will create an initial setup for you. • Voxel Count Based Simulation Quality - Adjust your simulation quality with precise voxel count control instead of testing grid spacing values. • Managed Folders - A Managed Folder is a folder which either will be extended by the name of the max scene file and an appropiate sim file name or you can use the versioning functionality. • Multiple Simulation Mode - Simulate as many container as you like with the Multiple Simulation Mode. • Preview & Compare - Quickliy preview your current simulation up to the current slider time and compare two simulations in the RAM Player. • Switch File Extension - Quickly switch the file extension to FumeFXs native format to simulate faster or choose Field3D or OpenVDB for final output. • Handy Interface • Installer - FumeFX ModernUI comes with an easy to use installer because a lot of files (icons, scripts, ini-files) have to be placed in their appropriate locations (e. g. your user directory). • You can uninstall FumeFX ModernUI like any other application.
Fnord software has announced that ProEXR, their popular OpenEXR Plugin for processing multi-channel EXR files in Photoshop, After Effects and Premiere Pro, open-source.
ProEXR lets you choose from all the compression options available in OpenEXR. Most EXR compression is lossless, but one of the most interesting options is a lossy method similar to JPEG, applied to the world of floating point. Using B44 compression and Luminance/Chroma sampling, HDR images can be crushed to a fraction of their uncompressed size, usually without visible artifacts, only in ProEXR.
• Layered EXR output from an After Effects comp. • Retention of EXR color space information. • Support for both 32-bit and 16-bit floating point. • Full control over alpha channel processing. • Automatic EXR project set-up in After Effects and Nuke. • Built with the latest OpenEXR libraries. • Free, open source After Effects plug-ins for working with OpenEXR files and 3D Channels. • Free, open source OpenEXR file support for Adobe Premiere Pro.
Availability and system requirements
ProEXR is available free under a GPL licence. The plugins are compatible with Photoshop CS3, After Effects CS3 and Premiere Pro CS6 and above, running on Windows or Mac OS X.
This script helps you create Amazing Terrains in a matter of seconds right inside Maya. You can save time and improve the quality of terrains with Easy Terrain, using Maya's paint tools to sculpt, and create rivers, custom erosions, or what you like.
This script helps you create Amazing Terrains in a matter of seconds right inside Maya. You can save time and improve the quality of terrains with Easy Terrain, using Maya's paint tools to sculpt, and create rivers, custom erosions, or what you like.
The Toolbag Scene Importer is now available for free on the Unreal Engine Marketplace. It could cut down on re-work by using the Toolbag Scene Importer to load your Toolbag 2 and 3 scenes directly into Unreal Engine. On import, your models and textures will be loaded, materials automatically set up and an optional blueprint object created. Marmoset Toolbag’s industry standard physically-based rendering makes it easy to get a quick & accurate preview of your work before sending it off to Unreal. For best results, use the Unreal Engine 4 preset material in Toolbag to ensure that your content follows the metalness/roughness/GGX standard.
Supported Features: - Mesh and texture import - Automatic material setup - Support for common material modules - Import as a blueprint - Supports Toolbag 2 & Toolbag 3 scene files
Art created with specular maps will be converted to use Unreal's metalness shaders, however for best results content should be authored for the metalness workflow.
Not Supported: - Images files that Unreal does not support, such as grayscale TGAs, TIFs, etc - Animated content (animated meshes will be imported at the base pose) - Scene objects such as cameras, fog, shadow caster, etc - Some advanced material modules, such as secondary reflections, anisotropic reflections, Newton’s rings, detail normal maps, etc
Andrea Perisano shares NUKE Color Correct Manager gizmo - a tool to manage your exr color manipulation. You can directly change your passes throught in affecting your input, without creating shuffle nodes, or adding from and plus merge nodes.
Download Color Correct Manager gizmo for NUKE 8.0 or later here More NUKE Plugin [post_ad]
[ #NUKE ]
Andrea Perisano shares NUKE Color Correct Manager gizmo - a tool to manage your exr color manipulation. You can directly change your passes throught in affecting your input, without creating shuffle nodes, or adding from and plus merge nodes.
Hocuspocus studio has shared a free tool called SubstanceToVRAY to help you import and setup the shaders created with Substance Painter, inside 3ds Max and render them properly with V-ray. Check out the Step by step below to see how to convert from Substance Painter to V-Ray using SubstanceToVRAY
Step 1 : Note: This tool works with the default V-ray workflow (with change on gamma). Setup your scene as usual to export objects from 3dsMax to Substance Painter. Keep in mind to give correct name without forbidden characters to your shader it’s important.
Step2- Substance Painter Import your model, bake and create all your shaders as usual (you can follow the great tutorial from Darren Wallace if you need help to setup scene).
Step 3- Substance Painter export. Select the V-ray exporter in the config and choose format of your export and the folder where you want to export all your maps.
Step 4- 3dsMax import. Launch SubstanceToVRAY tool (Scripting>run script>SubstanceToVRAY.mse) and select the folder where you create your maps. The script will find all the maps you create and recognize shaders. If you click on CREATE Shaders, you will find on your material editors the shaders created (with correct gamma correction for the maps) ready to render. You can directly assign new shaders by clicking on “Update Scene Object”.
Substance Painter Render
3dsmax Vray Render
Download
More details and Download Free SubstanceToVRAY tool for 3ds Max here Related video: Allegorithmic Substance Painter 2.4 New Features
Fast Spline Connector tool for Cinema 4D versions 2 is released, with this plug-in you can work with built-in functions in Cinema 4D to connect a segments of a single spline.
Fast Spline Connector tool for Cinema 4D versions 2 is released, with this plug-in you can work with built-in functions in Cinema 4D to connect a segments of a single spline.
Exr-IO is an Adobe Photoshop plugin which is a robust and exact solution for dealing with multi-layer EXR pictures: Exr-IO loads all image channels from OpenEXR files into separate Photoshop layers, while preserving exact values, transparencies and dimensions.
Exr-IO supports all OpenEXR features and provides workflow optimizations for Photoshop: * Open and save all channels of the OpenEXR file * Support for Photoshop layer features like blending and opacity * Deep data sample import * Accurate support for chromaticities and color formats * Support for OpenEXR display window specification * Extensive load and save options * Adobe Photoshop 32 and 64 bit versions support (Windows) * Free of charge
Nir Koshet Levi has shared a very handy 3ds Max script for V-Ray user to find and bind - V-Ray Hdri & Sun in few clicks. The script will scan your hdri and find the sun location then will create V-Ray sun in this position and bind it to V-Ray Dome light. You can rotate the rig by rotation the dome light or in the VrayHDRI map(horz rotation).
The Script works only with V-Ray and better with sun&sky hdri (one strong light). It was working while tested on max 2015 - 2016
Author of 101 Autodesk Maya Tips - Dave Girard recently shared Cullinator Script for Autodesk Maya which can be used to interactively adjust near clip values for a camera in a handy floating window. This can also be used to correct Z-fighting – if you find you are seeing that, just increase the near cull slightly and it will go away
Download Cullinator Script for Autodesk Maya here . To run it, put the script in one of your Maya script folders and run “cullinator;” in the MEL command line. via Related video: Making of: Koi fish pond by Antonis Fylladitis
Corona for C4D Alpha 6 RC1 is now available for download with the latest feature set from the recently released Corona 1.5 for 3ds Max over to Corona for C4D.
So what are some of the most significant new features from the 1.5 Core that appear in A6 RC1?
-Interactive LightMix, -Bloom & glare, filmic tone mapping and other VFB post-processing features (accessible both through Corona VFB and C4D Picture Viewer), -PBR materials, -Image denoising, -Much faster displacement processing, -… and many, many more (complete list coming with the final A6 release).
Video Copilot announced new After Effects workflow plug-in called FX Console is now available for free! Speed up After Effects by making it work your way! Manage design progress with the new Snapshot tool and find the effects you need instantly
Video Copilot announced new After Effects workflow plug-in called FX Console is now available for free! Speed up After Effects by making it work your way! Manage design progress with the new Snapshot tool and find the effects you need instantly
-Accurate tracking of rigid objects. -Easy to use. Only important user-dependent parameters are shown in the UI while a lot of hidden parameters are intelligently calculated internally. -Fast. GeoTracker was developed while working on a film that required a lot of match moving. The crucial task was to speed up the tracking process as much as possible. We believe that GeoTracker significantly reduces the amount of “manual labor”. -GeoTracker makes it possible to create and adjust tracking information right inside The Foundry Nuke. It can shorten your workflow significantly. You don’t need to switch between applications and perform export/import when some inaccuracies are detected. -Native. It’s created using all strengths and possibilities of The Foundry Nuke API. -It’s just a beginning. When using GeoTracker, please keep in mind that it’s only a beta version What’s New in Beta v5.0 -Changed node type: GeoTracker is geo node now. GeoTracker's output can be used directly and results can be viewed in 3D in the native way. -Default camera: connecting default camera node is no longer reqired for tracking, positioning, e.t.c. Now an internal default camera, which can be easily exported, is used. -Minor interface changes and performance improvements.
-Accurate tracking of rigid objects. -Easy to use. Only important user-dependent parameters are shown in the UI while a lot of hidden parameters are intelligently calculated internally. -Fast. GeoTracker was developed while working on a film that required a lot of match moving. The crucial task was to speed up the tracking process as much as possible. We believe that GeoTracker significantly reduces the amount of “manual labor”. -GeoTracker makes it possible to create and adjust tracking information right inside The Foundry Nuke. It can shorten your workflow significantly. You don’t need to switch between applications and perform export/import when some inaccuracies are detected. -Native. It’s created using all strengths and possibilities of The Foundry Nuke API. -It’s just a beginning. When using GeoTracker, please keep in mind that it’s only a beta version What’s New in Beta v5.0 -Changed node type: GeoTracker is geo node now. GeoTracker's output can be used directly and results can be viewed in 3D in the native way. -Default camera: connecting default camera node is no longer reqired for tracking, positioning, e.t.c. Now an internal default camera, which can be easily exported, is used. -Minor interface changes and performance improvements.
FStormRender v0.3.4 for 3ds Max 2014 - 2017 is now available for download
>> See Also:
Changes: -Normal map support (FStormBitmap texture has an option normal map bump) -Improved displacement quality for fstormbitmap texture in monochrome (gray scale) mode. (can read 16bit images directly)
Download
Download FStormRender v0.3.4 for 3ds Max 2014 - 2017 here
Related video: Fstorm for 3ds Max: LaFerrari by Juan Garcia


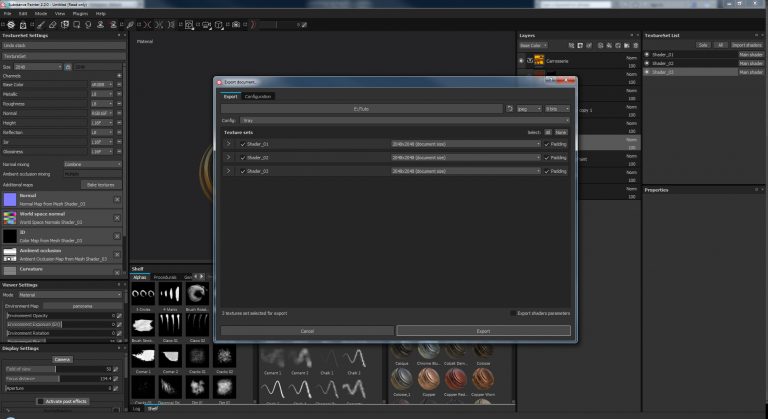
 Export to Unreal