Artikel 3ds Max,
Artikel Animation,
Artikel James Vecore,
Artikel John Martini,
Artikel Labyrinth,
Artikel Modeling,
Artikel Motion Graphic,

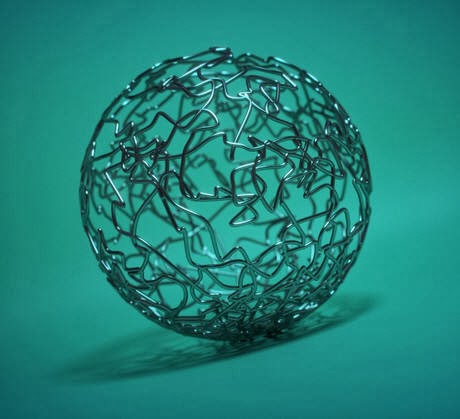
[ #3dsMax #Animation #MotionGraphics ] Designed by John Martini & Developed by James Vecore, Labyrinth is a spline plugin for 3ds Max which allows users to create splines on any given object in 3ds Max.
ex. (C:\Program Files\Autodesk\3ds Max #\plugins\)
Order - Sorting method used to order the location points
Origin Radar Sort – Forces the radar sorting methods to use the grid origin rather than the average position of the nodes in the list
Reverse Order – Flips the order in which the points are ordered
Smooth - Controls the knot interpolation for the base points
# Splines – Controls the number of splines being generated. Each spline gets a unique seed value
Range - Controls the number of points which will be used to generate a spline
Start Range – Animatable
End Range – Animatable
Offset - Aniamtable and is used to move the spline along the generated points
Loop - Determines whether the spline should loop through the points or not
Surface Points – Overrides the number of points being generated on a surface. Usable when Location type ‘Surface’ is used.
Draping - This generates a knot between each of the base points
Smooth Draping – Controls the interpolation of the newly generated knots
XYZ - These values control the positioning of the knots generated for draping
Download Labyrinth for 3ds Max 2012/2013/2014 (64bit only) just $20 here
More 3ds Max Plugin

>> See Also: Splines Scatter 1.0 for 3dsMax
The knots which make up Labyrinth are automatically attached to the object’s their generated on. This feature gives users the ability to easily produce stunning effects. This video gives a general overview of the controls for the tool as well as various ways to use the tool in production. More videos to come soon. Below are time-stamps you can use to quickly navigate through the video to see specific effects.Installation
To install just place the files in the downloaded file into your max plugins directory.ex. (C:\Program Files\Autodesk\3ds Max #\plugins\)
How To Use
This tool is a shape object. You can create this tool by going to the ‘Create’ panel in 3ds Max and then going to the shapes tab. From there you’ll find Labyrinth by changing the dropdownlist to ‘JokerMartini.Feature Overview
In depth explanation of controls
Controls
Location - Placement at which knots will be generatedOrder - Sorting method used to order the location points
Origin Radar Sort – Forces the radar sorting methods to use the grid origin rather than the average position of the nodes in the list
Reverse Order – Flips the order in which the points are ordered
Smooth - Controls the knot interpolation for the base points
# Splines – Controls the number of splines being generated. Each spline gets a unique seed value
Range - Controls the number of points which will be used to generate a spline
Start Range – Animatable
End Range – Animatable
Offset - Aniamtable and is used to move the spline along the generated points
Loop - Determines whether the spline should loop through the points or not
Surface Points – Overrides the number of points being generated on a surface. Usable when Location type ‘Surface’ is used.
Draping - This generates a knot between each of the base points
Smooth Draping – Controls the interpolation of the newly generated knots
XYZ - These values control the positioning of the knots generated for draping
Download
Download Labyrinth for 3ds Max 2012/2013/2014 (64bit only) just $20 here
More 3ds Max Plugin

>> See Also: Splines Scatter 1.0 for 3dsMax
The knots which make up Labyrinth are automatically attached to the object’s their generated on. This feature gives users the ability to easily produce stunning effects. This video gives a general overview of the controls for the tool as well as various ways to use the tool in production. More videos to come soon. Below are time-stamps you can use to quickly navigate through the video to see specific effects.Installation
To install just place the files in the downloaded file into your max plugins directory.ex. (C:\Program Files\Autodesk\3ds Max #\plugins\)
How To Use
This tool is a shape object. You can create this tool by going to the ‘Create’ panel in 3ds Max and then going to the shapes tab. From there you’ll find Labyrinth by changing the dropdownlist to ‘JokerMartini.Feature Overview
In depth explanation of controls
Controls
Location - Placement at which knots will be generatedOrder - Sorting method used to order the location points
Origin Radar Sort – Forces the radar sorting methods to use the grid origin rather than the average position of the nodes in the list
Reverse Order – Flips the order in which the points are ordered
Smooth - Controls the knot interpolation for the base points
# Splines – Controls the number of splines being generated. Each spline gets a unique seed value
Range - Controls the number of points which will be used to generate a spline
Start Range – Animatable
End Range – Animatable
Offset - Aniamtable and is used to move the spline along the generated points
Loop - Determines whether the spline should loop through the points or not
Surface Points – Overrides the number of points being generated on a surface. Usable when Location type ‘Surface’ is used.
Draping - This generates a knot between each of the base points
Smooth Draping – Controls the interpolation of the newly generated knots
XYZ - These values control the positioning of the knots generated for draping
Download
Download Labyrinth for 3ds Max 2012/2013/2014 (64bit only) just $20 here
More 3ds Max Plugin


