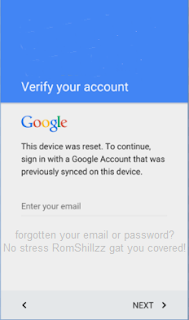
How To Flash Lenovo A658T Using SML Flash Tool

Artikel tutorials, This is a tutorial on how to How To Flash Lenovo A658T Using SML Flash Tool. With this tutorial you can flash all lenovo A658T devices.

Requirements

STEPS »

STEP 1: Download & Launch SML Flash Tool.
STEP 2: After launching, Click on Download
STEP 3: Select the relevant profile (DT-L1801-Micron-USB-HS or DT-L1801-Micron-USB).
STEP 4: Click on the three doted button (...) to select the firmware.
STEP 5: Under Download Type, Select Bootloader.
STEP 6: After selecting the firmware, Tick on Show info (which is located at the left the bottom of the SML Flash Tool).
STEP 7: Click on the Start Download button to begin flash process.
STEP 8: Connect device >> holding volume - button only, Patiently wait for the process to complete.
STEP 9: Once the process has been  completed, a green success bar will be shown.


Follow the Screenshots or read the tutorials above


Watch Full Video ⤵


Please Leave a comment after using this Tutorials
Report if you cannot do this.
 

This is a tutorial on how to How To Flash Lenovo A658T Using SML Flash Tool. With this tutorial you can flash all lenovo A658T devices.

Requirements

STEPS »

STEP 1: Download & Launch SML Flash Tool.
STEP 2: After launching, Click on Download
STEP 3: Select the relevant profile (DT-L1801-Micron-USB-HS or DT-L1801-Micron-USB).
STEP 4: Click on the three doted button (...) to select the firmware.
STEP 5: Under Download Type, Select Bootloader.
STEP 6: After selecting the firmware, Tick on Show info (which is located at the left the bottom of the SML Flash Tool).
STEP 7: Click on the Start Download button to begin flash process.
STEP 8: Connect device >> holding volume - button only, Patiently wait for the process to complete.
STEP 9: Once the process has been  completed, a green success bar will be shown.


Follow the Screenshots or read the tutorials above


Watch Full Video ⤵


Please Leave a comment after using this Tutorials
Report if you cannot do this.
 

Best Way To Easily Bypass FRP in Most MTK & SPD Android Devices

Artikel tutorials, This is a tutorial on how to bypass Factory Reset Protection (FRP) in most SPD & MTK Android devices running any Android Version that supports FRP Security

What Is FRP?

Factory Reset Protection (FRP) is a security method that was designed to make sure someone can't just wipe and factory reset your phone if you've lost it or it was stolen.

This Simply means that when a device enters this FRP security, its data can not be accessed. You need to be the owner of the device before you can unlock it. In a situation whereby you own an android device and just after wiping or factory resetting the device it enters the Factory Reset Protection (FRP) and maybe you no longer have access to your email or password then you will need to bypass the FRP security to gain access or use your device.

There are many ways in which the FRP security can be bypassed and this is one of the easiest way! On this tutorial, i will show you on how you can bypass this factory reset protection (FRP) without much stress or bypass knowledge in most SPD & MTK Android devices just follow the step below.

STEPS »

Requirements:
Miracle Box Setup or Cracked Version
or 
Volcano Box with Inferno Tool Setup

USING MIRACLE BOX

STEP 1: Launch Miracle Box.
STEP 2: Select your device chip tab (MTK or SPD).
STEP 3: Select Read.
STEP 4: Connect device >> holding volume + and volume - button of your device at the same time or holding power button only.
STEP 5: Select the location to save the firmware.
STEP 6: Once the firmware has been successfully read and saved, Now write back the firmware you have saved into your device - When writing back this firmware unselect Userdata and Cache or Ignore but perform a hard reset after writing.


USING INFERNO TOOL

STEP 1: Launch Inferno Tool Setup based on your device chip (MTK_Vol_EXT or SPD_Vol_EXT).
STEP 2: Select Backup Factory Files.
STEP 3: Select USB Backup.
STEP 4: Select the location to save the firmware.
STEP 5: Connect device >> holding volume + and volume - button of your device at the same time or holding power button only.
 STEP 6: Once the firmware has been successfully read and saved, Now write back the firmware you have saved into your device - When writing back this firmware unselect Userdata and Cache or Ignore but perform a hard reset after writing.

For more tutorial with screenshots and videos:
Conclusion: This tutorial is simply trying to let you know that you can bypass FRP protection in most MTK & SPD Android devices by simply backing up the affected device and writing back the firmware you have backed up back into the device. By doing so the factory reset protection security data are being wiped in the process leaving the device FRP free. Enjoy and Happy Bypassing!


Please Leave a comment after using this Tutorial
Report if you cannot do this.


This is a tutorial on how to bypass Factory Reset Protection (FRP) in most SPD & MTK Android devices running any Android Version that supports FRP Security

What Is FRP?

Factory Reset Protection (FRP) is a security method that was designed to make sure someone can't just wipe and factory reset your phone if you've lost it or it was stolen.

This Simply means that when a device enters this FRP security, its data can not be accessed. You need to be the owner of the device before you can unlock it. In a situation whereby you own an android device and just after wiping or factory resetting the device it enters the Factory Reset Protection (FRP) and maybe you no longer have access to your email or password then you will need to bypass the FRP security to gain access or use your device.

There are many ways in which the FRP security can be bypassed and this is one of the easiest way! On this tutorial, i will show you on how you can bypass this factory reset protection (FRP) without much stress or bypass knowledge in most SPD & MTK Android devices just follow the step below.

STEPS »

Requirements:
Miracle Box Setup or Cracked Version
or 
Volcano Box with Inferno Tool Setup

USING MIRACLE BOX

STEP 1: Launch Miracle Box.
STEP 2: Select your device chip tab (MTK or SPD).
STEP 3: Select Read.
STEP 4: Connect device >> holding volume + and volume - button of your device at the same time or holding power button only.
STEP 5: Select the location to save the firmware.
STEP 6: Once the firmware has been successfully read and saved, Now write back the firmware you have saved into your device - When writing back this firmware unselect Userdata and Cache or Ignore but perform a hard reset after writing.


USING INFERNO TOOL

STEP 1: Launch Inferno Tool Setup based on your device chip (MTK_Vol_EXT or SPD_Vol_EXT).
STEP 2: Select Backup Factory Files.
STEP 3: Select USB Backup.
STEP 4: Select the location to save the firmware.
STEP 5: Connect device >> holding volume + and volume - button of your device at the same time or holding power button only.
 STEP 6: Once the firmware has been successfully read and saved, Now write back the firmware you have saved into your device - When writing back this firmware unselect Userdata and Cache or Ignore but perform a hard reset after writing.

For more tutorial with screenshots and videos:
Conclusion: This tutorial is simply trying to let you know that you can bypass FRP protection in most MTK & SPD Android devices by simply backing up the affected device and writing back the firmware you have backed up back into the device. By doing so the factory reset protection security data are being wiped in the process leaving the device FRP free. Enjoy and Happy Bypassing!


Please Leave a comment after using this Tutorial
Report if you cannot do this.


How To Root Tecno W2

Artikel tutorials, This is a tutorial on how to Root Tecno W2.

What Is Rooting?

Rooting can be said to be Android jailbreaking. Its simply a means of unlocking the operating system of a device so you can install unapproved apps, delete unwanted bloatware, update the OS, replace the firmware, overclock (or underclock) the processor, writing or changing IMEI, installing fonts, customizing anything and so on.


Tecno W2 another Tecno device runing Android 6.0 (Marshmallow).
This simply means that rooting this device could sound difficult but it's simply easy to execute if you carefully follow the few steps given bellow.

How To Root Tecno W2


Important Notes:

[*] Take a Backup of your personal data before proceeding to this steps. As this helps you to recover the personal data when ever any thing wrong happens.

STEPS »

STEP 1: Download and install Miracle Box Drivers v1.0 to your PC.
STEP 3: Backup your device firmware in scatter format using miracle Box.
STEP 4: Copy SuperSU.zip to both the device internal storage and SD card (external storage).
STEP 5: Create a new folder name RomShillzz on your PC.
STEP 6: Copy preloader.bin from your Miracle Box backup into the RomShillzz folder you created.
STEP 7: Download Philz for Tecno W2 [romshillzz].
STEP 8: Extract the Philz file and copy the Philz recovery.bin and scatter file to the RomShillzz folder, making peloader.bin, scatter file and recovery.bin in the folder.
STEP 9: Flash the preloader.bin and recovery.bin using Miracle Box.

Flashing the Preloader.bin and Recovery.bin using Miracle Box. 


STEP 10: Boot the device into recovery mode by pressing and holding Volume up button + Power button.
STEP 11: In the Philz recovery,
use the Volume buttons to navigate and Power button to select.
STEP 12: Select Install zip.
STEP 13: Choose zip from /storage/.

STEP 14: Navigate to the location of the SuperSU.zip and select it.
STEP 15: Click Yes Install SR1-SuperSU-v2.78-SR1-20160915123031.zip.
STEP 14: If you are prompted to fix root, select No.
STEP 15: Patiently wait until the flashing process is complete.
STEP 16: After the flashing process is completed, Reeboot Device normally.

Now you have successfully rooted your Tecno W2!
Confirm Root: Download and install Root Checker from Google Play Store or from here


You might also like:


Please Leave a comment after using this Tutorials
Report if you cannot do this.


This is a tutorial on how to Root Tecno W2.

What Is Rooting?

Rooting can be said to be Android jailbreaking. Its simply a means of unlocking the operating system of a device so you can install unapproved apps, delete unwanted bloatware, update the OS, replace the firmware, overclock (or underclock) the processor, writing or changing IMEI, installing fonts, customizing anything and so on.


Tecno W2 another Tecno device runing Android 6.0 (Marshmallow).
This simply means that rooting this device could sound difficult but it's simply easy to execute if you carefully follow the few steps given bellow.

How To Root Tecno W2


Important Notes:

[*] Take a Backup of your personal data before proceeding to this steps. As this helps you to recover the personal data when ever any thing wrong happens.

STEPS »

STEP 1: Download and install Miracle Box Drivers v1.0 to your PC.
STEP 3: Backup your device firmware in scatter format using miracle Box.
STEP 4: Copy SuperSU.zip to both the device internal storage and SD card (external storage).
STEP 5: Create a new folder name RomShillzz on your PC.
STEP 6: Copy preloader.bin from your Miracle Box backup into the RomShillzz folder you created.
STEP 7: Download Philz for Tecno W2 [romshillzz].
STEP 8: Extract the Philz file and copy the Philz recovery.bin and scatter file to the RomShillzz folder, making peloader.bin, scatter file and recovery.bin in the folder.
STEP 9: Flash the preloader.bin and recovery.bin using Miracle Box.

Flashing the Preloader.bin and Recovery.bin using Miracle Box. 


STEP 10: Boot the device into recovery mode by pressing and holding Volume up button + Power button.
STEP 11: In the Philz recovery,
use the Volume buttons to navigate and Power button to select.
STEP 12: Select Install zip.
STEP 13: Choose zip from /storage/.

STEP 14: Navigate to the location of the SuperSU.zip and select it.
STEP 15: Click Yes Install SR1-SuperSU-v2.78-SR1-20160915123031.zip.
STEP 14: If you are prompted to fix root, select No.
STEP 15: Patiently wait until the flashing process is complete.
STEP 16: After the flashing process is completed, Reeboot Device normally.

Now you have successfully rooted your Tecno W2!
Confirm Root: Download and install Root Checker from Google Play Store or from here


You might also like:


Please Leave a comment after using this Tutorials
Report if you cannot do this.


How To Write IMEI On MTK Android Devices Using Inferno Tool

Artikel tutorials, This is a tutorial on how to Write IMEI On MTK Android Devices Using Inferno Tool. With this tutorial you can write IMEI on any version (including Lollipop, Marshmallow & Nougat) of MTK Android device without any root permission all you need to do is follow the steps below.

Requirements

STEPS »

STEP 1: Download & Launch the Inferno Tool MTK Setup.
STEP 2: After launching the Inferno Tool, Click on Write IMEI.
STEP 3:
IMEI1: For SIM 1 IMEI.
IMEI2: For SIM 2 IMEI.

To enable the SIM 2 IMEI, Tick on the box closer to the "IMEI2".
Now you write any 15 digit IMEI number of your choice.

STEP 4: Click on the Next Button.
STEP 5:
Choose Write IMEI(USB) when using USB Cable.
Choose Write IMEI(META) when the device is in META Mode.

STEP 6: Connect device >> holding volume + and volume - button of your device at the same time or holding power button only. Once the device has been connected, Patiently wait for the process to complete.
STEP 7:  Once the process has been  completed, reboot device and dial *#06# to check if the IMEI has been successfully written.


Follow the Screenshots or read the tutorials above


Watch Full Video ⤵


Please Leave a comment after using this Tutorials
Report if you cannot do this.

This is a tutorial on how to Write IMEI On MTK Android Devices Using Inferno Tool. With this tutorial you can write IMEI on any version (including Lollipop, Marshmallow & Nougat) of MTK Android device without any root permission all you need to do is follow the steps below.

Requirements

STEPS »

STEP 1: Download & Launch the Inferno Tool MTK Setup.
STEP 2: After launching the Inferno Tool, Click on Write IMEI.
STEP 3:
IMEI1: For SIM 1 IMEI.
IMEI2: For SIM 2 IMEI.

To enable the SIM 2 IMEI, Tick on the box closer to the "IMEI2".
Now you write any 15 digit IMEI number of your choice.

STEP 4: Click on the Next Button.
STEP 5:
Choose Write IMEI(USB) when using USB Cable.
Choose Write IMEI(META) when the device is in META Mode.

STEP 6: Connect device >> holding volume + and volume - button of your device at the same time or holding power button only. Once the device has been connected, Patiently wait for the process to complete.
STEP 7:  Once the process has been  completed, reboot device and dial *#06# to check if the IMEI has been successfully written.


Follow the Screenshots or read the tutorials above


Watch Full Video ⤵


Please Leave a comment after using this Tutorials
Report if you cannot do this.
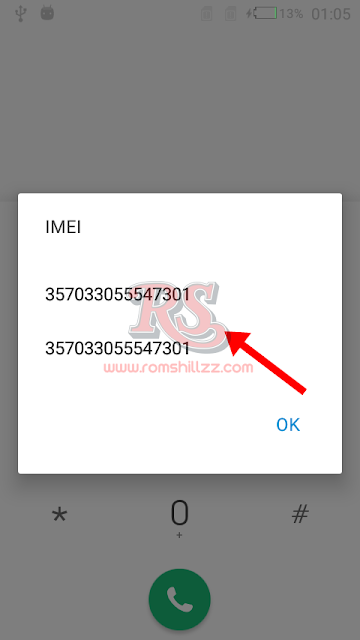
How To Root Tecno W3

Artikel tutorials, This is a tutorial on how to Root Tecno W3.

What Is Rooting?

Rooting can be said to be Android jailbreaking. Its simply a means of unlocking the operating system of a device so you can install unapproved apps, delete unwanted bloatware, update the OS, replace the firmware, overclock (or underclock) the processor, writing or changing IMEI, installing fonts, customizing anything and so on.


Tecno W3 another Tecno device runing Android 6.0 (Marshmallow).
This simply means that rooting this device could sound difficult but it's simply easy to execute if you carefully follow the few steps given bellow.

How To Root Tecno W3


Important Notes:

[*] Take a Backup of your personal data before proceeding to this steps. As this helps you to recover the personal data when ever any thing wrong happens.

STEPS »

STEP 1: Download and install Miracle Box Drivers v1.0 to your PC.
STEP 3: Copy SuperSU.zip to both the device internal storage and SD card (external storage).
STEP 4: Insert the SD card to the Device.
STEP 6: Power of Device.
STEP 7: Flash the TWRP recovery.img to the device using SP Flash tool.

Flashing the TWRP recovery.img using SP Flash tool.


STEP 7: Boot the device into recovery mode by pressing and holding Volume up button + Power button.
STEP 8: In TWRP, if you will get a prompt asking you to swipe to allow modification then swipe.
STEP 9: In TWRP recovery, tap Install.
STEP 10: Navigate to the location of the SuperSU.zip and select it.
STEP 11: Swipe to confirm flash and patiently wait until the flashing process is complete.
STEP 12: After the flashing process is completed, Reeboot System.

Now you have successfully rooted your Infinix X557 (Infinix Hot 4)!
Confirm Root: Download and install Root Checker from Google Play Store or from here

Follow the Screenshots or read the tutorials above


You might also like:


Please Leave a comment after using this Tutorials
Report if you cannot do this.


This is a tutorial on how to Root Tecno W3.

What Is Rooting?

Rooting can be said to be Android jailbreaking. Its simply a means of unlocking the operating system of a device so you can install unapproved apps, delete unwanted bloatware, update the OS, replace the firmware, overclock (or underclock) the processor, writing or changing IMEI, installing fonts, customizing anything and so on.


Tecno W3 another Tecno device runing Android 6.0 (Marshmallow).
This simply means that rooting this device could sound difficult but it's simply easy to execute if you carefully follow the few steps given bellow.

How To Root Tecno W3


Important Notes:

[*] Take a Backup of your personal data before proceeding to this steps. As this helps you to recover the personal data when ever any thing wrong happens.

STEPS »

STEP 1: Download and install Miracle Box Drivers v1.0 to your PC.
STEP 3: Copy SuperSU.zip to both the device internal storage and SD card (external storage).
STEP 4: Insert the SD card to the Device.
STEP 6: Power of Device.
STEP 7: Flash the TWRP recovery.img to the device using SP Flash tool.

Flashing the TWRP recovery.img using SP Flash tool.


STEP 7: Boot the device into recovery mode by pressing and holding Volume up button + Power button.
STEP 8: In TWRP, if you will get a prompt asking you to swipe to allow modification then swipe.
STEP 9: In TWRP recovery, tap Install.
STEP 10: Navigate to the location of the SuperSU.zip and select it.
STEP 11: Swipe to confirm flash and patiently wait until the flashing process is complete.
STEP 12: After the flashing process is completed, Reeboot System.

Now you have successfully rooted your Infinix X557 (Infinix Hot 4)!
Confirm Root: Download and install Root Checker from Google Play Store or from here

Follow the Screenshots or read the tutorials above


You might also like:


Please Leave a comment after using this Tutorials
Report if you cannot do this.


How To Root Infinix X557 (Infinix Hot 4)

Artikel tutorials, This is a tutorial on how to Root Infinix X557 (Infinix Hot 4).

What Is Rooting?

Rooting can be said to be Android jailbreaking. Its simply a means of unlocking the operating system of a device so you can install unapproved apps, delete unwanted bloatware, update the OS, replace the firmware, overclock (or underclock) the processor, writing or changing IMEI, installing fonts, customizing anything and so on.


Infinix X557 (Infinix Hot 4) another Infinix device runing Android 6.0 (Marshmallow).
This simply means that rooting this device could sound difficult but it's simply easy to execute if you carefully follow the few steps given bellow.

How To Root Infinix X557


Important Notes:

[*] Take a Backup of your personal data before proceeding to this steps. As this helps you to recover the personal data when ever any thing wrong happens.

STEPS »

STEP 1: Download and install Miracle Box Drivers v1.0 to your PC.
STEP 3: Copy SuperSU.zip to both the device internal storage and SD card (external storage).
STEP 4: Insert the SD card to the Device.
STEP 6: Power of Device.
STEP 7: Flash the TWRP recovery.img to the device using SP Flash tool.

Flashing the TWRP recovery.img using SP Flash tool.


STEP 7: Boot the device into recovery mode by pressing and holding Volume up button + Power button.
STEP 8: In TWRP, if you will get a prompt asking you to swipe to allow modification then swipe.
STEP 9: In TWRP recovery, tap Install.
STEP 10: Navigate to the location of the SuperSU.zip and select it.
STEP 11: Swipe to confirm flash and patiently wait until the flashing process is complete.
STEP 12: After the flashing process is completed, Reeboot System.

Now you have successfully rooted your Infinix X557 (Infinix Hot 4)!
Confirm Root: Download and install Root Checker from Google Play Store or from here

Follow the Screenshots or read the tutorials above


You might also like:


Please Leave a comment after using this Tutorials
Report if you cannot do this.


This is a tutorial on how to Root Infinix X557 (Infinix Hot 4).

What Is Rooting?

Rooting can be said to be Android jailbreaking. Its simply a means of unlocking the operating system of a device so you can install unapproved apps, delete unwanted bloatware, update the OS, replace the firmware, overclock (or underclock) the processor, writing or changing IMEI, installing fonts, customizing anything and so on.


Infinix X557 (Infinix Hot 4) another Infinix device runing Android 6.0 (Marshmallow).
This simply means that rooting this device could sound difficult but it's simply easy to execute if you carefully follow the few steps given bellow.

How To Root Infinix X557


Important Notes:

[*] Take a Backup of your personal data before proceeding to this steps. As this helps you to recover the personal data when ever any thing wrong happens.

STEPS »

STEP 1: Download and install Miracle Box Drivers v1.0 to your PC.
STEP 3: Copy SuperSU.zip to both the device internal storage and SD card (external storage).
STEP 4: Insert the SD card to the Device.
STEP 6: Power of Device.
STEP 7: Flash the TWRP recovery.img to the device using SP Flash tool.

Flashing the TWRP recovery.img using SP Flash tool.


STEP 7: Boot the device into recovery mode by pressing and holding Volume up button + Power button.
STEP 8: In TWRP, if you will get a prompt asking you to swipe to allow modification then swipe.
STEP 9: In TWRP recovery, tap Install.
STEP 10: Navigate to the location of the SuperSU.zip and select it.
STEP 11: Swipe to confirm flash and patiently wait until the flashing process is complete.
STEP 12: After the flashing process is completed, Reeboot System.

Now you have successfully rooted your Infinix X557 (Infinix Hot 4)!
Confirm Root: Download and install Root Checker from Google Play Store or from here

Follow the Screenshots or read the tutorials above


You might also like:


Please Leave a comment after using this Tutorials
Report if you cannot do this.


How To Root Tecno Camon C9

Artikel tutorials, This is a tutorial on how to Root Tecno Camon C9.

What Is Rooting?

Rooting can be said to be Android jailbreaking. Its simply a means of unlocking the operating system of a device so you can install unapproved apps, delete unwanted bloatware, update the OS, replace the firmware, overclock (or underclock) the processor, writing or changing IMEI, installing fonts, customizing anything and so on.


Tecno Camon C9 is another Tecno device running Android 6.0 (Marshmallow).
This simply means that rooting this device could sound difficult but it's simply easy to execute if you carefully follow the few steps given bellow.

How To Root Tecno W4


Important Notes:

[*] Take a Backup of your personal data before proceeding to this steps. As this helps you to recover the personal data when ever any thing wrong happens.


STEP #1. You need to unlock the bootloader.

How To Unlock Tecno Camon C9 or C9s Bootloader

STEP 1: Enable USB Debugging on the device.
STEP 2: Enable OEM Unlocking under Settings > Developer options.
STEP 3: Setup ADB and Fastboot on the PC.
STEP 4: Connect the device to your PC via USB cord (while Powered On).
STEP 5: Launch ADB.
STEP 6: In ADB, run the following command (press Enter after the imputing the command).


adb devices

STEP 7: ADB should detect the device. If ADB detects other devices but not the Tecno C9 or C9 Pro, then it must be an ADB clash, see https://forum.hovatek.com/thread-10111.html
STEP 8:  Once the device is detected, boot it into Fastboot by running the following command (press Enter after the imputing the command).


adb reboot -bootloader

STEP 9: The Device wounld now enter Fastboot (black screen with only fastboot written at the top or bottom).
STEP 10: In Fastboot, run the following command (press Enter after imputing the command).
fastboot oem unlock

STEP 11: Now you would get a prompt on the device asking you to confirm Bootloader unlock, press the volume up button for Yes.
STEP 12: You would now get a success message.
STEP 13: Reboot the device by running the command below (press Enter after imputing the command).

fastboot reboot


Follow the Screenshots or read the tutorials above


Now you have succeeded in unlocking your tecno camon C9 or C9s bootloader so get ready for STEP #2.

STEP #2
STEP 1: Download TWRP for Tecno Camon C9 [romshillzz].
STEP 2: Setup ADB and Fastboot on the PC using the guide at https://forum.hovatek.com/thread-588.html
STEP 3: Extract and copy the TWRP recovery.img into the same folder of the fastboot.exe and adb.exe.

Follow the Screenshot or read the tutorials above


STEP 4: Download SuperSU 2.66.zip.
STEP 5: Copy SuperSU.zip to both the device internal storage and SD card (external storage).
STEP 6: Connect the device to your PC via USB cord (while Powered On) and boot device into fastboot as instructed in STEP #1.
STEP 7: When the device enters Fastboot, Flash the TWRP recovery.img to the device by typing the command below then pressing Enter after imputing.

fastboot boot recovery.img

STEP 8: The device would automatically boot into TWRP recovery mode.
STEP 9: In TWRP, if you will get a prompt asking you to swipe to allow modification then swipe.
STEP 10: In TWRP recovery, tap Install.
STEP 11: Navigate to the location of the SuperSU.zip and select it.
STEP 12: Swipe to confirm flash and patiently wait until the flashing process is complete.
STEP 13: After the flashing process is completed, Reeboot System.


Now you have successfully rooted your Tecno Camon C9!
Confirm Root: Download and install Root Checker from Google Play Store or from here
Please Leave a comment after using this Tutorials
Report if you cannot do this.


This is a tutorial on how to Root Tecno Camon C9.

What Is Rooting?

Rooting can be said to be Android jailbreaking. Its simply a means of unlocking the operating system of a device so you can install unapproved apps, delete unwanted bloatware, update the OS, replace the firmware, overclock (or underclock) the processor, writing or changing IMEI, installing fonts, customizing anything and so on.


Tecno Camon C9 is another Tecno device running Android 6.0 (Marshmallow).
This simply means that rooting this device could sound difficult but it's simply easy to execute if you carefully follow the few steps given bellow.

How To Root Tecno W4


Important Notes:

[*] Take a Backup of your personal data before proceeding to this steps. As this helps you to recover the personal data when ever any thing wrong happens.


STEP #1. You need to unlock the bootloader.

How To Unlock Tecno Camon C9 or C9s Bootloader

STEP 1: Enable USB Debugging on the device.
STEP 2: Enable OEM Unlocking under Settings > Developer options.
STEP 3: Setup ADB and Fastboot on the PC.
STEP 4: Connect the device to your PC via USB cord (while Powered On).
STEP 5: Launch ADB.
STEP 6: In ADB, run the following command (press Enter after the imputing the command).


adb devices

STEP 7: ADB should detect the device. If ADB detects other devices but not the Tecno C9 or C9 Pro, then it must be an ADB clash, see https://forum.hovatek.com/thread-10111.html
STEP 8:  Once the device is detected, boot it into Fastboot by running the following command (press Enter after the imputing the command).


adb reboot -bootloader

STEP 9: The Device wounld now enter Fastboot (black screen with only fastboot written at the top or bottom).
STEP 10: In Fastboot, run the following command (press Enter after imputing the command).
fastboot oem unlock

STEP 11: Now you would get a prompt on the device asking you to confirm Bootloader unlock, press the volume up button for Yes.
STEP 12: You would now get a success message.
STEP 13: Reboot the device by running the command below (press Enter after imputing the command).

fastboot reboot


Follow the Screenshots or read the tutorials above


Now you have succeeded in unlocking your tecno camon C9 or C9s bootloader so get ready for STEP #2.

STEP #2
STEP 1: Download TWRP for Tecno Camon C9 [romshillzz].
STEP 2: Setup ADB and Fastboot on the PC using the guide at https://forum.hovatek.com/thread-588.html
STEP 3: Extract and copy the TWRP recovery.img into the same folder of the fastboot.exe and adb.exe.

Follow the Screenshot or read the tutorials above


STEP 4: Download SuperSU 2.66.zip.
STEP 5: Copy SuperSU.zip to both the device internal storage and SD card (external storage).
STEP 6: Connect the device to your PC via USB cord (while Powered On) and boot device into fastboot as instructed in STEP #1.
STEP 7: When the device enters Fastboot, Flash the TWRP recovery.img to the device by typing the command below then pressing Enter after imputing.

fastboot boot recovery.img

STEP 8: The device would automatically boot into TWRP recovery mode.
STEP 9: In TWRP, if you will get a prompt asking you to swipe to allow modification then swipe.
STEP 10: In TWRP recovery, tap Install.
STEP 11: Navigate to the location of the SuperSU.zip and select it.
STEP 12: Swipe to confirm flash and patiently wait until the flashing process is complete.
STEP 13: After the flashing process is completed, Reeboot System.


Now you have successfully rooted your Tecno Camon C9!
Confirm Root: Download and install Root Checker from Google Play Store or from here
Please Leave a comment after using this Tutorials
Report if you cannot do this.


Popular Games